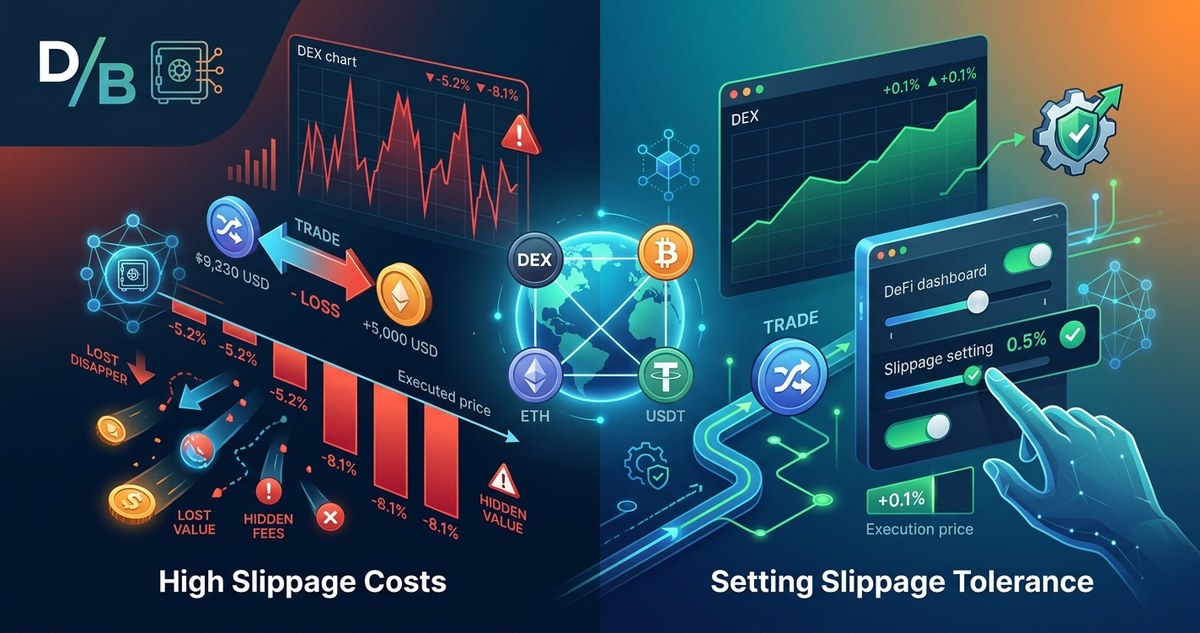
You hit swap on a decentralized exchange. The transaction goes through, but the price you got is worse than what you saw on screen. Maybe it was only a fraction of a percent. Maybe it was a lot more. That gap between the expected price and the execution price is called slippage. It happens in traditional stock markets, and it happens constantly in crypto. The difference is that on a DEX, you have a direct control called slippage tolerance. Most traders ignore this setting until they lose money. If you have ever watched a trade fail or felt cheated by the final price, this guide will show you how to set your slippage tolerance crypto settings with confidence.
Slippage tolerance is your safety guard on decentralized exchanges. Set it too high, and you risk buying tokens at a terrible price. Set it too low, and your transactions fail during normal price moves. The sweet spot depends on the token’s liquidity and volatility. This guide teaches you how to read the market, calculate the right tolerance, and avoid the hidden costs that eat into your portfolio.
What Slippage Actually Means in Crypto
Slippage is the difference between the price you expect when you submit a trade and the price you actually get when the trade executes. On a centralized exchange like Coinbase or Binance, you see a live order book. You place a limit order, and it fills at that price or not at all. On a decentralized exchange powered by an automated market maker (AMM), things work differently.
When you swap Token A for Token B on Uniswap or a similar DEX, your trade interacts directly with a liquidity pool. The pool has a formula that changes the price based on the size of your trade relative to the pool’s depth. A small trade in a deep pool moves the price very little. A large trade in a shallow pool moves the price a lot. That price movement is slippage.
In simple terms: if the pool runs out of one token before your trade finishes, the price shifts. The shift can work for you or against you.
Positive vs Negative Slippage
Positive slippage means you got a better price than expected. This happens when the price moves in your favor between submission and execution. It is rare, but it does occur.
Negative slippage is the more common experience. You get fewer tokens than you expected because the price moved against you. This is the hidden cost that eats into your profits.
Most traders focus on gas fees and swap fees. They forget that slippage can cost them more than both combined on a single trade.
Why Slippage Tolerance Matters More Than You Think
Slippage tolerance is the maximum percentage of price change you are willing to accept for a trade to go through. You set it before you confirm the transaction. If the actual price change exceeds your tolerance, the transaction fails.
Here is why that matters:
- Protection from bad execution: A high tolerance means you accept almost any price. During a volatile moment, that can result in a terrible deal.
- Prevention of failed transactions: A tolerance that is too low will cause your trades to fail even during normal market movement. You waste gas fees and miss opportunities.
- Defense against MEV bots: Maximal extractable value (MEV) bots watch the mempool for profitable opportunities. If your slippage tolerance is too high, a bot can front-run your transaction and profit at your expense.
Setting the right slippage tolerance crypto value is not just about convenience. It is about protecting your capital from both market volatility and predatory bots.
The Hidden Costs of High Slippage
Leaving your slippage tolerance at the default setting of 0.5% or 1% is usually safe for stablecoins and blue-chip tokens. But many traders crank it up to 5%, 10%, or even higher to ensure their trade goes through. Here is what that costs you.
Price Impact on Large Trades
When you trade a significant amount relative to the pool’s liquidity, the price impact is substantial. A 5% slippage tolerance on a $10,000 trade means you are willing to accept up to $500 in price difference. That is a large chunk of value to give up.
MEV Attacks
MEV bots scan pending transactions. If they see a transaction with a high slippage tolerance, they can sandwich your trade with their own. They buy low, let your trade push the price up, and then sell high. You end up paying the inflated price while the bot captures the profit. This happens in seconds.
Failed Trades That Still Cost Gas
If your tolerance is too low, your transaction fails. But you still pay the gas fee for the failed attempt. On Ethereum mainnet during high congestion, those fees add up. On Solana, the fees are lower, but failed transactions still waste time and network resources.
How to Calculate the Right Slippage Tolerance
There is no single number that works for every trade. The right setting depends on three factors: the token’s liquidity, the token’s volatility, and the size of your trade.
Factor 1: Liquidity
Check the depth of the liquidity pool. On Uniswap, you can look at the total value locked in the pool. A pool with $10 million in liquidity can handle a $1,000 trade with minimal price impact. A pool with only $50,000 in liquidity will see significant slippage on that same trade.
Factor 2: Volatility
Some tokens move 5% in a single minute. Others move less than 0.1% in an hour. If you are trading a meme coin that swings wildly, you need a higher tolerance. If you are swapping USDC for DAI, you can use a very low tolerance.
Factor 3: Trade Size
The larger your trade relative to the pool, the more slippage you will experience. A good rule of thumb is to keep your trade under 1% of the pool’s total liquidity to avoid major price impact.
Here is a reference table for common scenarios:
| Token Type | Pool Liquidity | Recommended Slippage Tolerance | Notes |
|---|---|---|---|
| Stablecoin | $10M+ | 0.1% to 0.3% | Very low volatility, deep pools |
| Blue chip (ETH, WBTC) | $5M+ | 0.3% to 0.5% | Moderate volatility, good liquidity |
| Mid cap token | $500K to $2M | 0.5% to 1% | Higher volatility, thinner pools |
| Low cap token | Under $500K | 1% to 3% | Thin pools, price swings common |
| New meme coin | Under $100K | 3% to 5% | Extreme volatility, high risk |
Step-by-Step: How to Set Slippage Tolerance Like a Pro
Follow these steps before every trade. It takes 30 seconds and can save you real money.
-
Check the pool depth: Open the DEX interface and look at the liquidity pool information. Note the total value locked. If it is not displayed, use a block explorer to check the pair’s contract.
-
Estimate your trade size percentage: Divide your trade amount by the pool’s total liquidity. Multiply by 100 to get the percentage.
-
Check recent price volatility: Look at the token’s price chart over the last 5 minutes. If it has moved more than 1%, you need to account for that movement.
-
Set your tolerance: Add the estimated price impact from step 2 to the recent volatility from step 3. Add a small buffer of 0.1% to 0.3%. This is your minimum safe tolerance.
-
Adjust for speed: If you need the trade to go through immediately, add another 0.5% to 1% to ensure execution. If you can wait, keep it tight.
-
Confirm and submit: Review the estimated output. If it looks reasonable, confirm the transaction.
Common Mistakes to Avoid
Even experienced traders make these errors.
- Using the same tolerance for every trade: Each token and pool is different. Do not assume 0.5% works everywhere.
- Setting it too high to avoid failure: A failed trade costs gas. A bad trade costs your principal. The latter is worse.
- Ignoring pool depth: A shallow pool with a large trade creates massive slippage. Split your trade into smaller chunks if needed.
- Forgetting about gas fees on failed attempts: On Ethereum, a failed swap can cost $10 to $50 in gas. On Solana, it is cheaper, but it still wastes time.
Expert advice: If you are trading a low-liquidity token, always do a test swap with a tiny amount first. This shows you the real slippage before you commit your full capital. It is the cheapest insurance you can buy.
Tools and Techniques for Advanced Slippage Management
If you trade regularly, consider these tools.
Slippage Calculators
Some DEX aggregators show you the estimated slippage before you confirm. Use them. They pull real-time data from the pool and give you a number. Compare that to your manual calculation.
Limit Orders on DEXs
Some newer DEXs support limit orders. Instead of setting a slippage tolerance, you set a maximum price. The trade executes only if the price stays within your limit. This is more precise than a percentage.
Splitting Large Trades
If your trade is more than 1% of the pool, split it into multiple smaller trades. Execute them one at a time. This reduces the price impact of each individual trade and gives you better average pricing.
Using Layer 2 Networks
If you are trading on Ethereum mainnet, consider moving to a Layer 2 like Arbitrum or Optimism. The gas fees are lower, and the transaction speed is faster. This reduces the time window for price movement and lowers your risk of slippage.
For more background on how these networks work, check out our guide on which Layer 2 networks work best for different DeFi strategies.
What to Do When Your Trade Fails
A failed transaction is frustrating, but it is not a loss. Here is what to do:
- Check the reason: Most wallets show you the revert reason. It might say “slippage exceeded” or “execution reverted.”
- Increase tolerance slightly: Add 0.2% to 0.5% and try again.
- Check pool liquidity again: Someone may have drained the pool since your last check.
- Wait for calmer markets: If the token is swinging wildly, wait 5 to 10 minutes for the price to stabilize.
- Consider a different DEX: Some DEXs have deeper pools for the same pair. Use a DEX aggregator to find the best rate.
If you are new to swapping tokens on a DEX, our complete walkthrough for first-timers covers the entire process from wallet connection to confirmation.
Putting It All Together for Safer Trades
Slippage tolerance crypto settings are not something to set once and forget. They are a dynamic tool that you adjust based on the specific trade, the pool, and the market conditions. A pro trader treats slippage tolerance like a volume knob, not a light switch.
Start by checking the pool depth. Then estimate your trade impact. Add recent volatility. Set your tolerance. Confirm. If the trade fails, adjust slightly and retry. If it goes through, review the final price to see if your estimate was accurate.
Over time, you will develop an intuition for what works. A stablecoin swap on a deep pool needs almost no tolerance. A low cap token on a thin pool needs careful attention. The more you practice, the less slippage will cost you.
Remember that slippage is just one part of the cost of trading. Gas fees, swap fees, and impermanent loss also affect your bottom line. If you provide liquidity to pools, you should also understand what impermanent loss is and how it affects your returns.
Take Control of Your Trades Starting Today
You do not need to be a quant or a developer to set slippage tolerance correctly. You just need to slow down, check the numbers, and make a conscious choice before every trade. That small habit will save you money, reduce failed transactions, and protect you from MEV bots.
The next time you open a DEX, look for the slippage setting. It is usually hidden behind a gear icon or an “advanced” toggle. Click it. Enter your calculated tolerance. Then confirm your trade with confidence. That is what it means to trade like a pro.